This important step is how the Participants are added to the platform, receive a welcome message and activate their accounts.
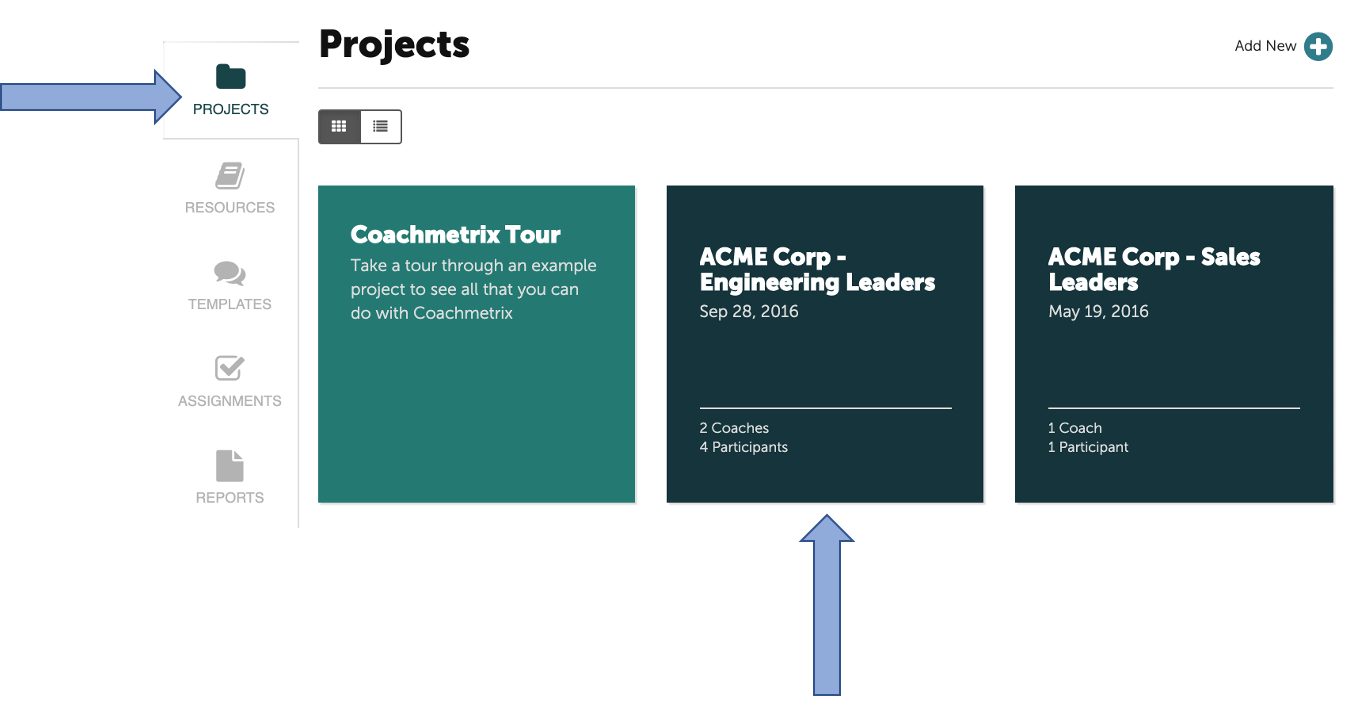
To add a Participant, from the Projects page, select the Project to which the Participants will be added.
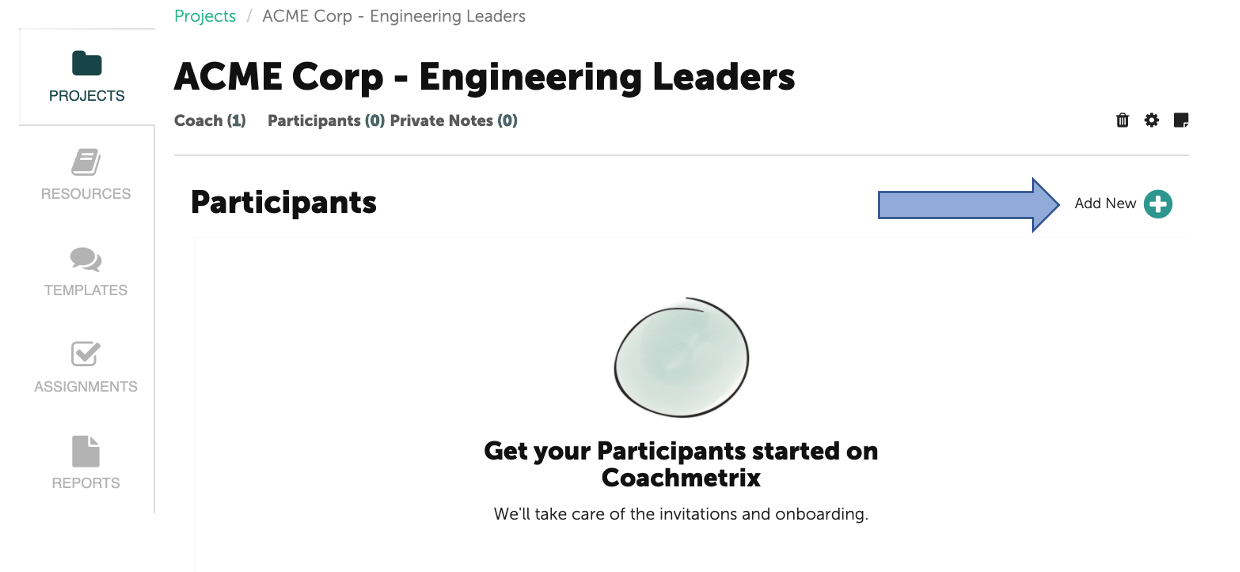
Click on the "Add New +" in the upper right corner to add Participants.
Enter the Participant(s) name, email address, and select a Coach from the drop down menu (if there is more than one Coach assigned to the Project).
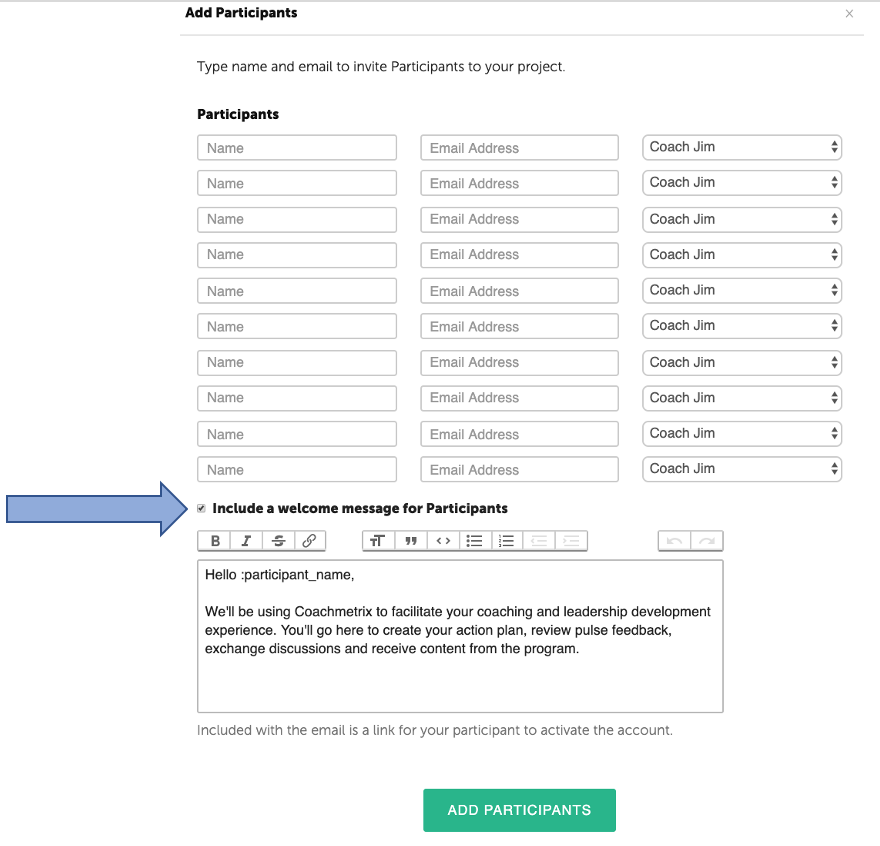
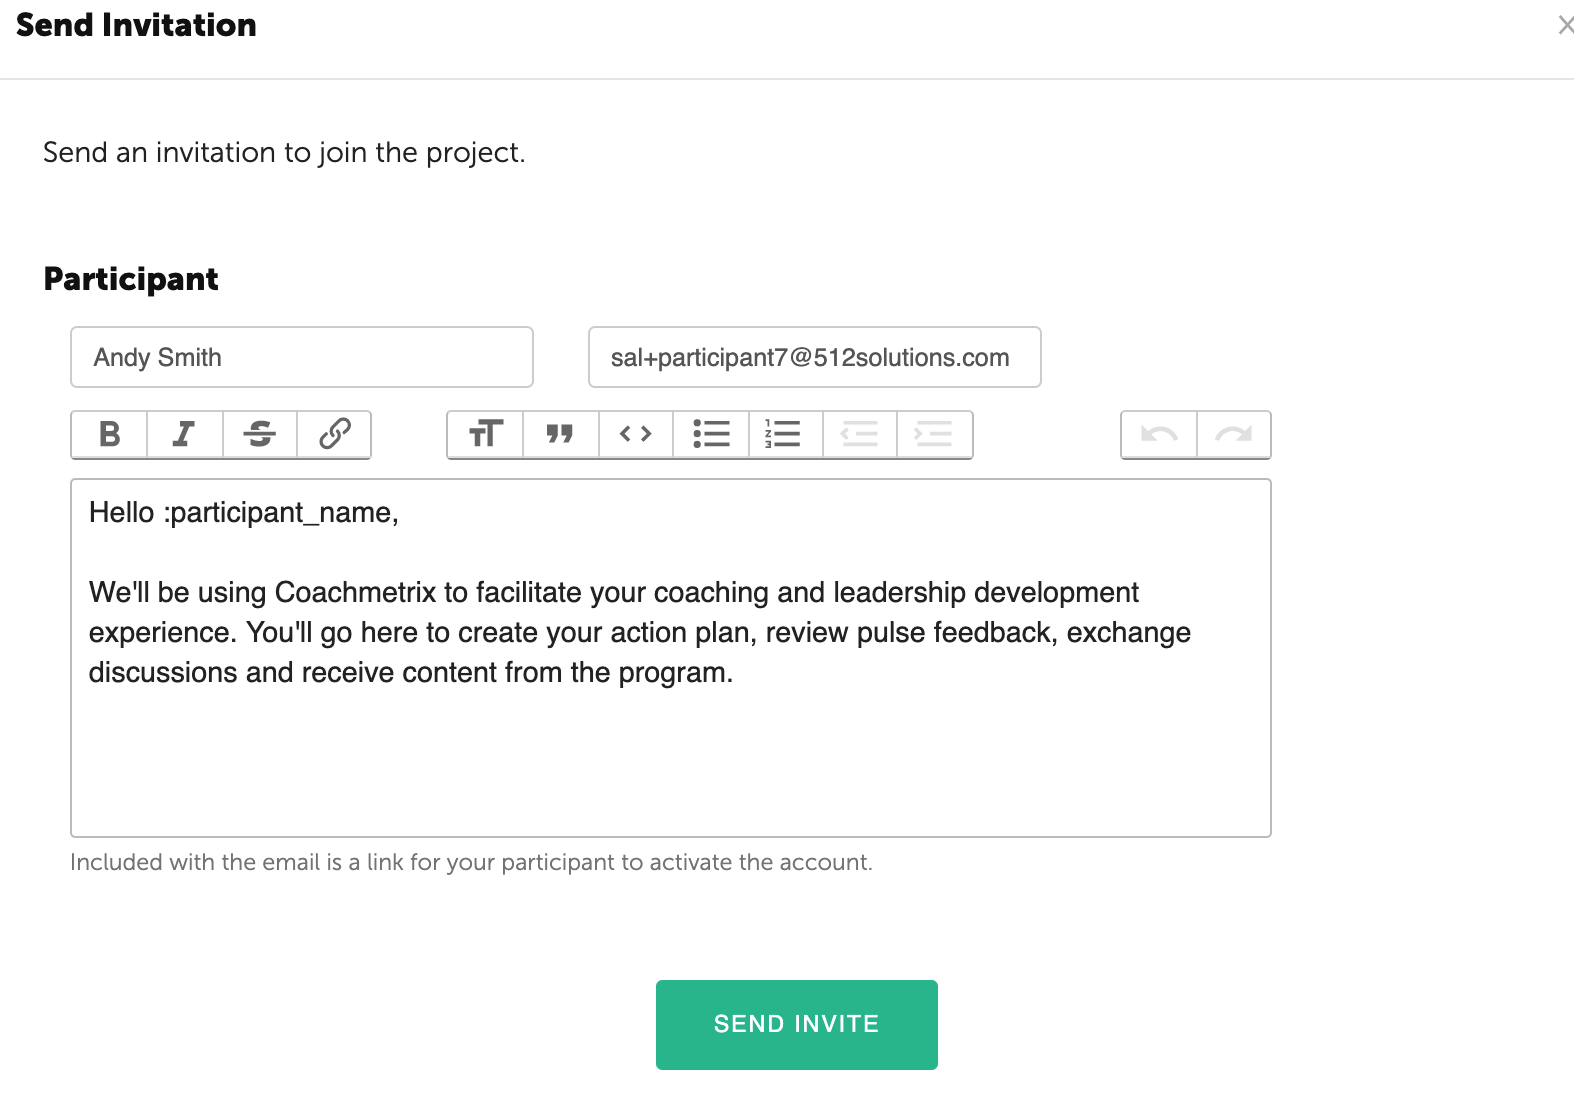
A Coach may send the Participant(s) a welcome message by clicking on the checkbox "Include a welcome message for Participants". The default message can be edited to include a customized welcome and specific information regarding the program.
NOTE: The welcome message may also be sent at a later time.
When finished, click the "Add Participants" green button.
Sending a Delayed Welcome Message or Reminder
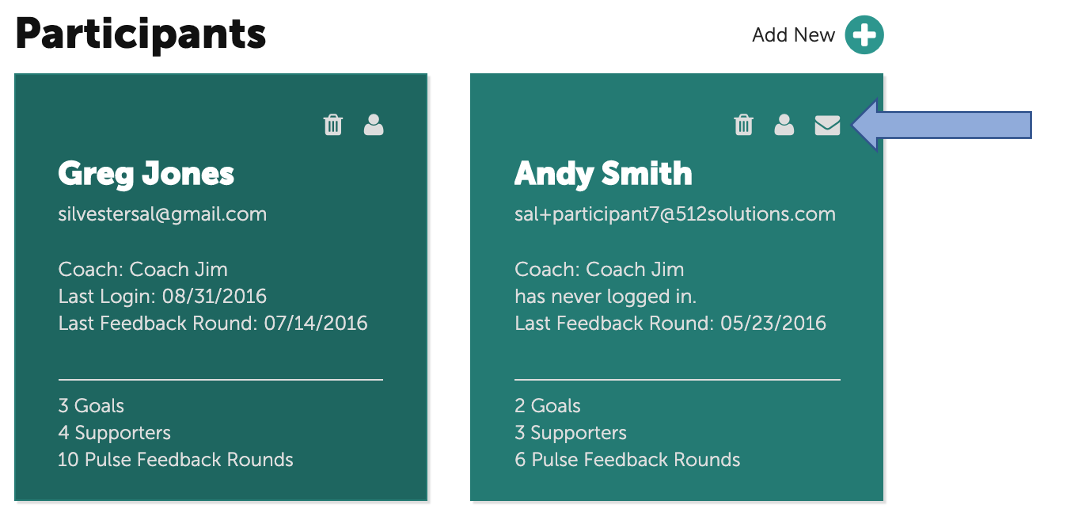
The Participant tile will display the last login date or if the Participant has never logged in. To send a delayed Welcome Message or to resend the Welcome Message, click on the envelope icon at the top corner of the participant's tile.
A Coach has the option of using the default text or customizing the message.
How Participants Activate Their Accounts
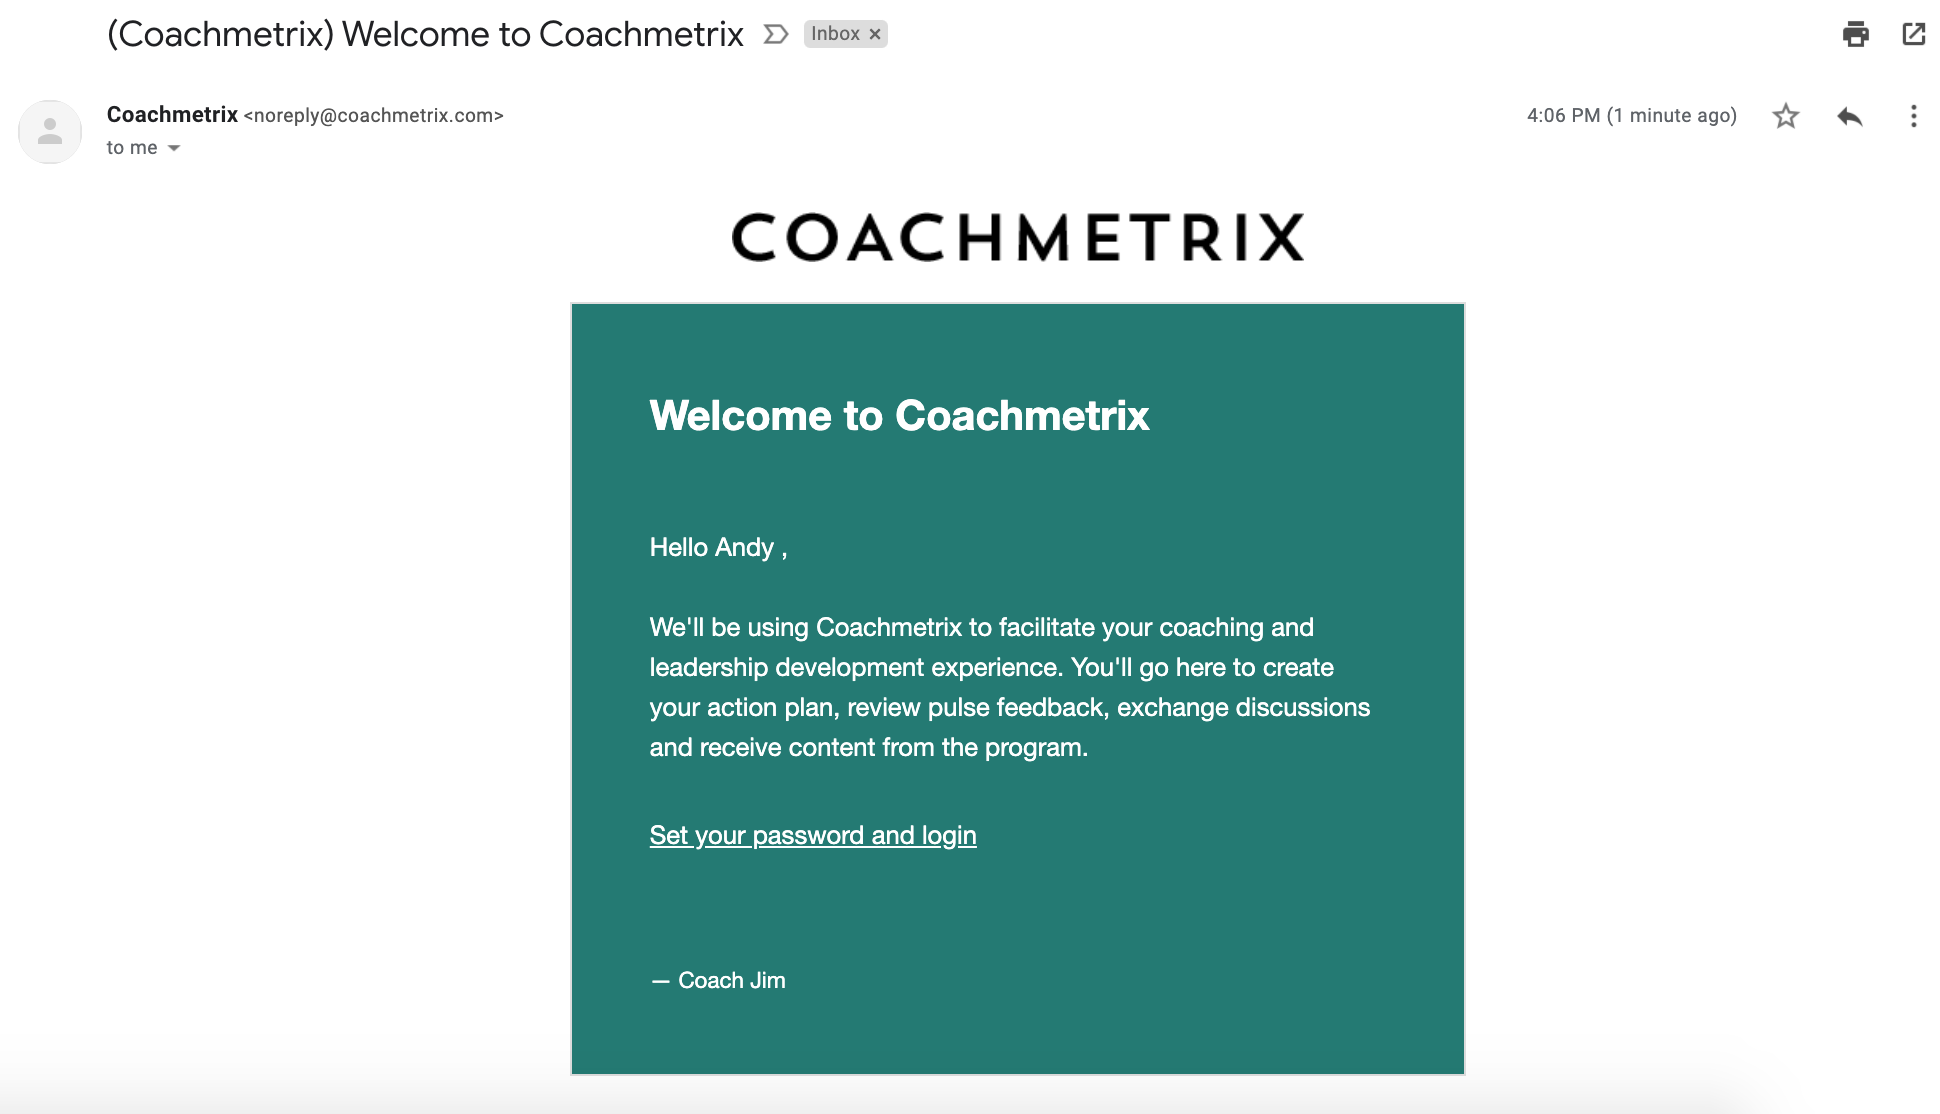
The Participant's welcome message email includes a link for Participants to activate their accounts. This is a significant step. If the Participant's account is not activated, they will not have access to their data.
NOTE: The email is sent from Coachmetrix (noreply@coachmetrix.com).